In CostMiner, the Products feature allows you to manage your materials and resources by creating, importing, and organising products by supplier. Products can be used in job estimates, linked to takeoff items, added to purchase orders, and associated with rates.
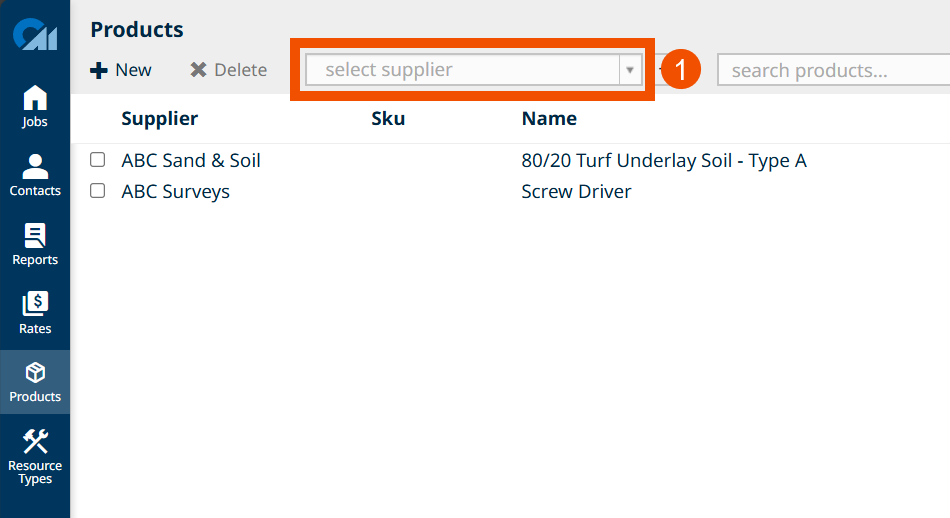
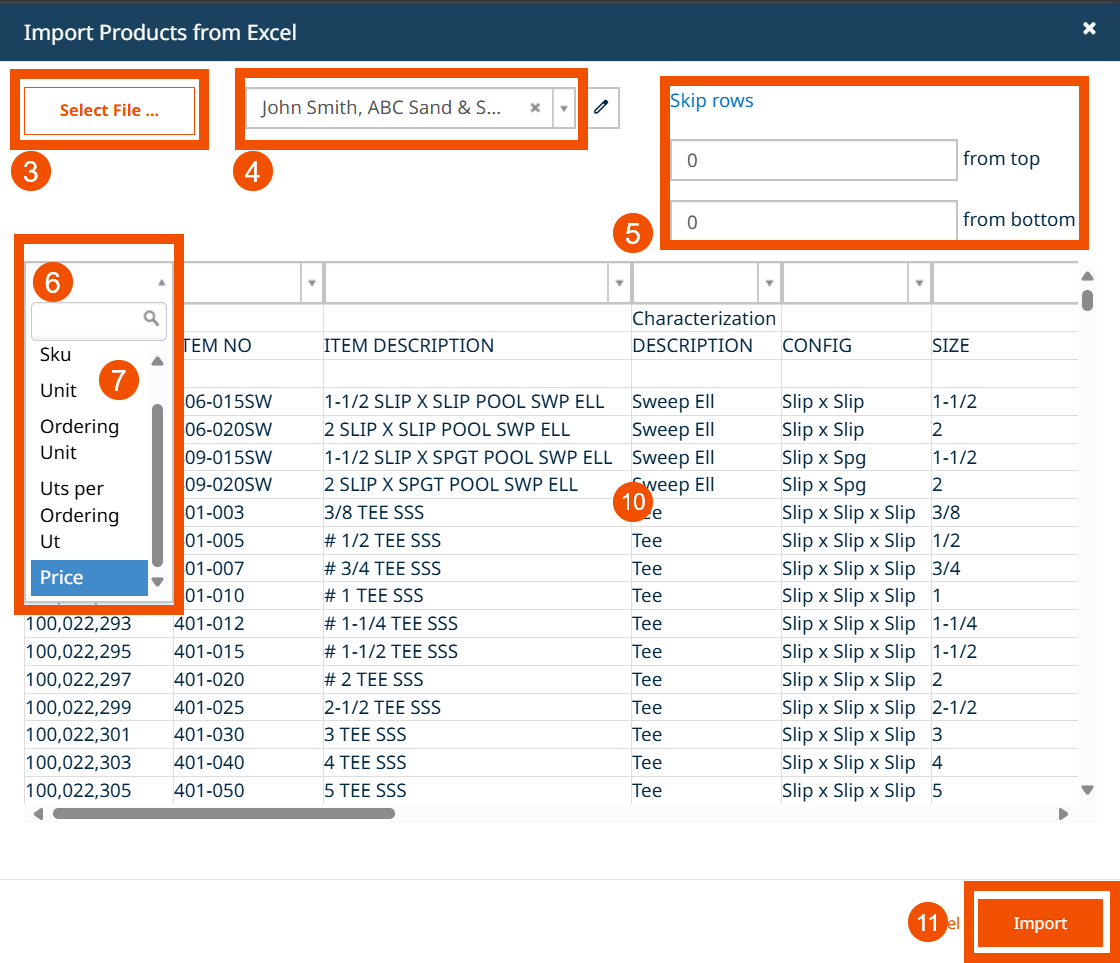
Products Screen.
- To open the ‘Products’ section, click ‘Products’ in the side menu
Creating a Product
CostMiner allows you to manually create products and link them to specific suppliers. This is ideal for adding individual items as needed and keeping your product list accurate and up to date.
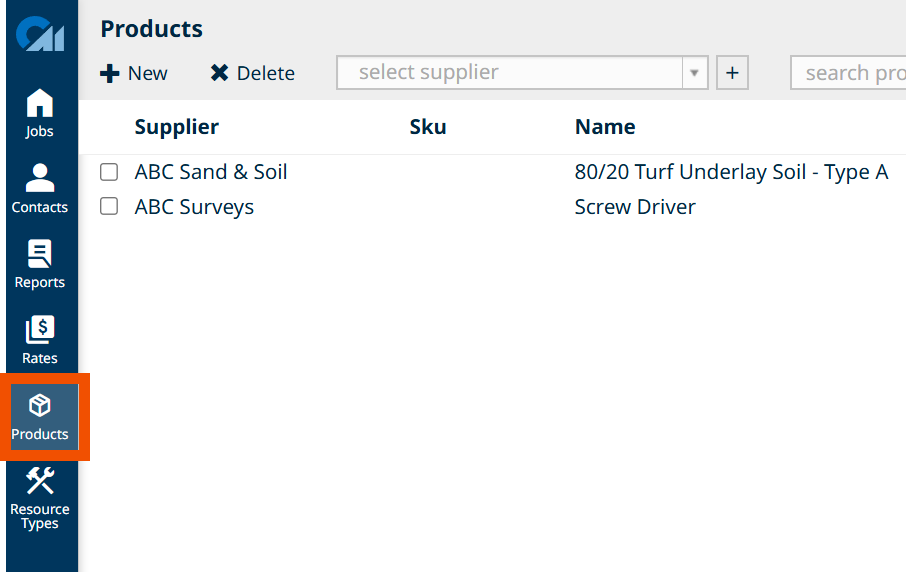
To create a product in CostMiner:
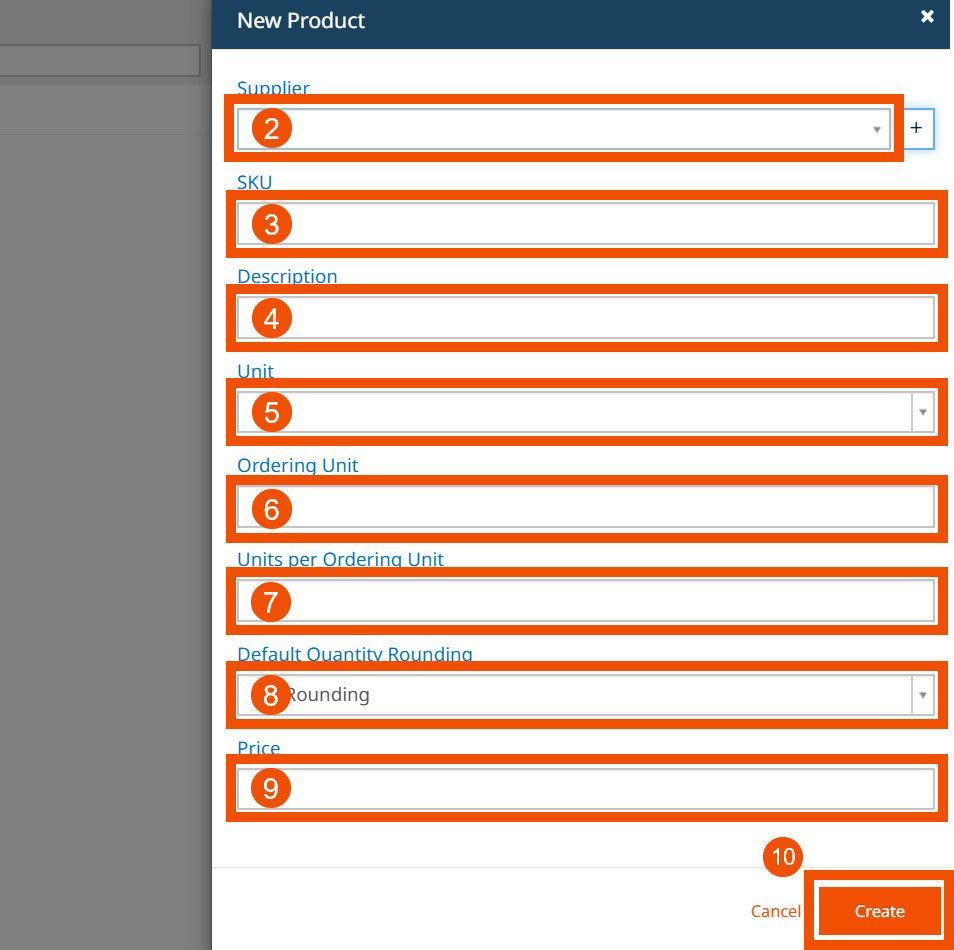
- To create a Product, click the ‘+ New’ button on the products tool bar
- Supplier – Select a supplier from the drop-down list. If the supplier doesn’t exist yet, click ‘+’ to add one.
- SKU – Enter the product’s stock-keeping unit (SKU) to uniquely identify it.
- Description – Provide a clear description of the product.
- Unit – Select the base unit of measure (e.g., m², m³, each).
- Ordering Unit – Enter the unit you purchase the product in (e.g., bricks, packs, lengths).
- Units per Ordering Unit – Specify how many base units are included in each ordering unit.
- Default Quantity Rounding – Choose how quantities will be rounded when ordering (options: No Rounding, Nearest, Round Up, Round Down).
- Price – Enter the cost per base unit or ordering unit.
- Click ‘Create’ to save the product.
Display Products per Supplier
You can easily filter products by supplier in CostMiner. This helps you quickly view, manage, and edit products associated with a particular supplier.
To view products by supplier in CostMiner:
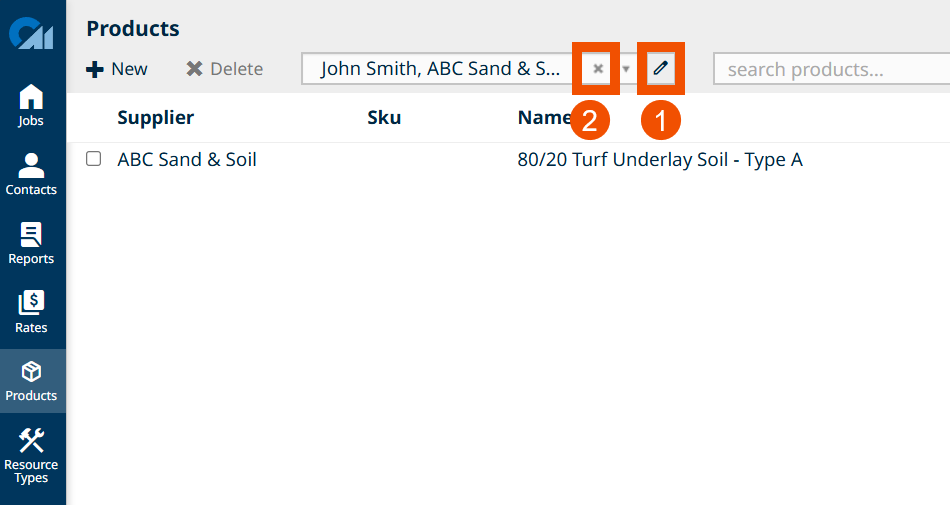
- Select a Supplier from the drop-down menu located on the top toolbar to filter products by that supplier.
- Edit a Supplier by clicking the pencil icon next to the supplier name (after selection).
- Clear the Selection by clicking the ‘X’ icon in the drop-down to display all products again.
Import Products from Excel
CostMiner allows you to quickly import products in bulk using an Excel spreadsheet. This is useful for uploading large product lists or updating pricing efficiently.
To import products from Excel:
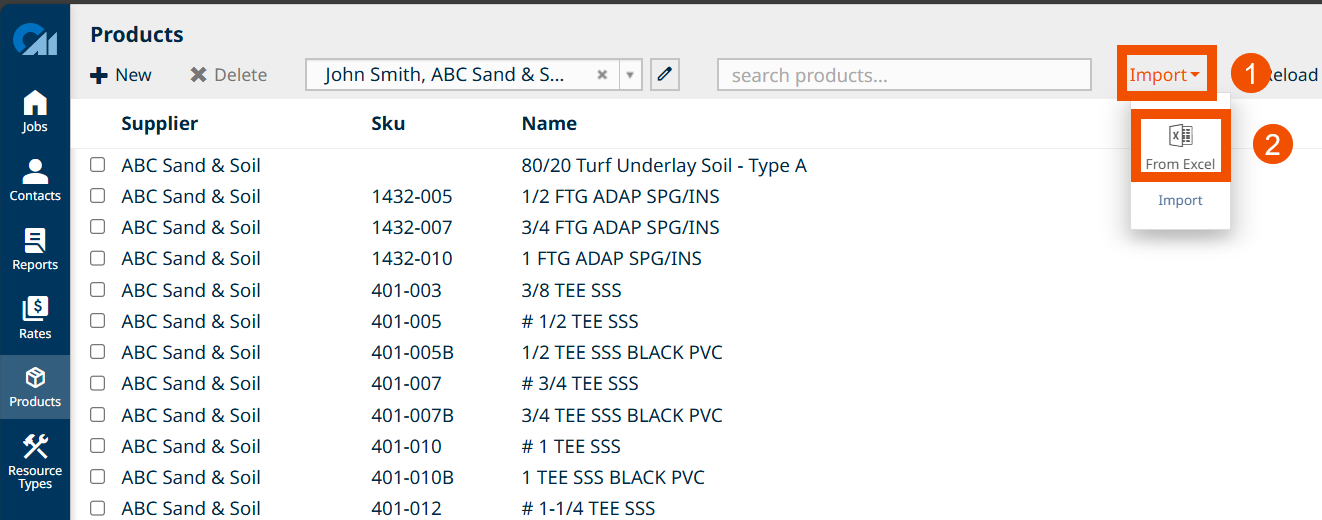
- Click the ‘Import’ Button located in the top toolbar of the Products section.
- Select ‘From Excel’ from the drop-down submenu.
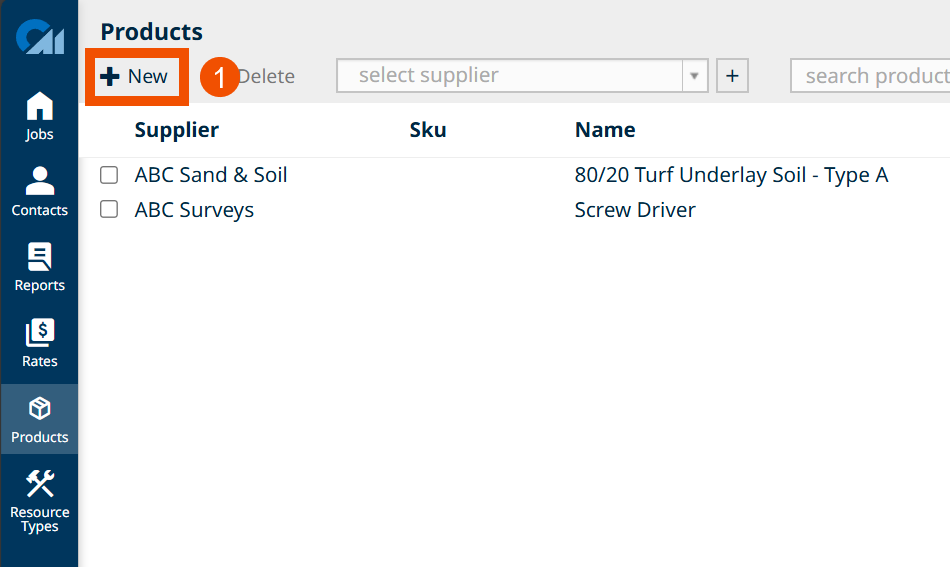
- Select Your Excel File by clicking ‘Select File…’ and choosing the supplier’s price list from your computer.
- Select the Supplier from the drop-down list. This step is mandatory, and all products in the file will be assigned to this supplier.
- (Optional) Skip Rows – If the file contains header rows or notes, use the ‘Skip rows from top’ and ‘Skip rows from bottom’ fields to ignore those lines.
- Map Your Columns – After the file is loaded, you will see a preview of the data:
- Use the drop-down menus above each column to map it to the appropriate product field (e.g., SKU, Description, Unit, Ordering Unit, Units per Ordering Unit, Price, etc.).
- Required fields such as Description, Unit, and Price must be mapped before you can proceed.
- Any unused columns can remain unmapped.
- Review the Data – Check the preview to ensure all data lines up correctly after mapping.
- Click ‘Import’ to complete the upload and add the products to your list.
Next Steps
With your products set up, you can now:
- Use products directly in your Job Estimates.
- Create Purchase Orders linked to your products and suppliers — see [Creating Purchase Orders].
- Link products to your Global Rates or Local Rates — see [Using Global Rates].
This ensures you get the most value from your product list by improving speed and accuracy across your estimating and ordering processes.

